Software Setup E2 Ethernet Peer Communications • 7-3
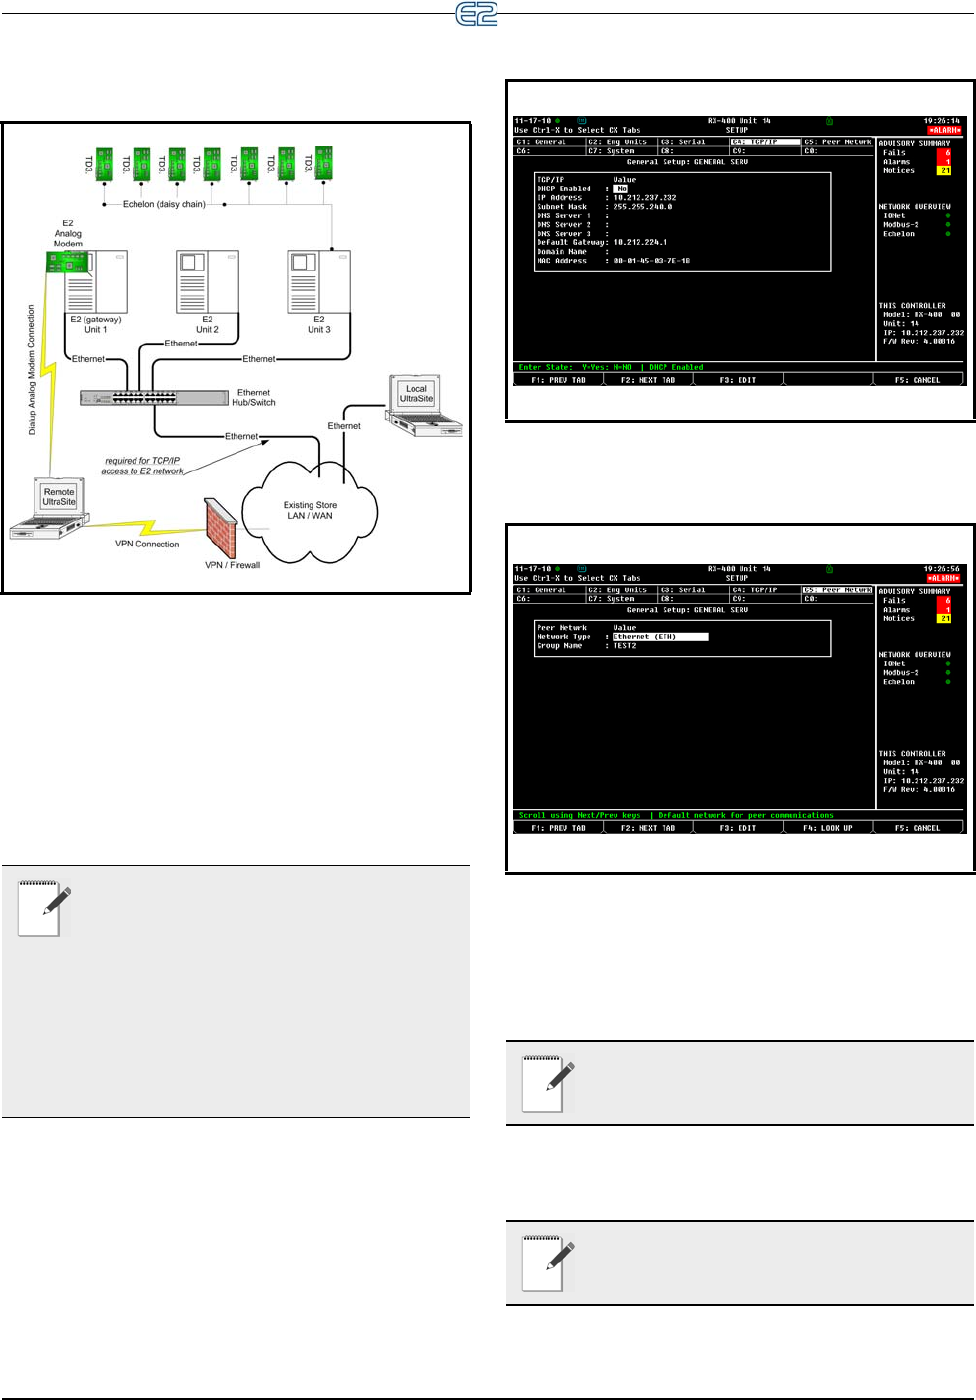
7.4.2 Open Network Layout
Figure 7-2 - Open Network Layout
7.5 Software Setup
1. Log on to the E2 controller
2. Navigate to the TCP/IP
setup screen (Alt + T)
NOTE: DHCP does not have to be enabled if
you have the IP Address, Subnet Mask, and
Primary Gateway se
ttings. (Contact your IT
Network Administrator for all IP configuration infor-
mation.) If you do not have the IP configuration set-
tings, and there is a DHCP server on the network, set
D
HCP Enabled to Yes and it will retrieve the informa-
tion from the server and populate those fields. E2 con-
trollers must all have the same Ether
net Subnet in
order to communicate box-to-box.
Figure 7-3 - TCP/IP Setup Screen
3. Tab over to the Peer Netwrk tab:
Figure 7-4
- Peer Network Tab - Set Network Type
4. Change Network Type to: Ethernet (ETH) and
press Enter. The Group Name field is now visi-
ble.
NOTE: If unsure of any tab settings, it is rec-
ommended that the default settings be used.
5. Once the Ethernet network
type is enabled, enter
a unique site name in the Group Name field.
NOTE: The site name is the unique identifier
for the site that will allow the controllers
wit
hin the same group to share data.
