License Management Quick Start • 10-19
five seconds.
10.14.2.2 The Manual ID Entry Method
The Manual ID Entry Method involves entering each
device’s twelve-digit ID number by hand. When entered,
the E2 searches the network and tries to match the ID
number to the device. When the E2 finds this device, the
commissioning process is completed.
The easiest way to set up a multiple-node store using
the Manual ID Entry Method is to arrange all network
devices into a list that shows each device’s name, subnet
and node address, controller type, and corresponding Neu-
ron ID number. Once this list is complete, each device
may be commissioned one at a time from the E2 front
panel.
To make a list of network devices, follow the steps
below:
1. For each record set up in the Controller Network
Configuration/Status Screen, write down the con-
tents of each device’s Controller Name, Model,
Subnet, and Node fields on a sheet of paper. If
desired, you may also include the model or serial
numbers of the units that will be controlled, as
well as a physical location.
2. When step 1 is complete, go to where each device
on the list is installed and locate each device’s
Neuron ID sticker. Every Echelon-compatible
device available from Retail Solutions has a
sticker on its enclosure that shows the unit’s Neu-
ron ID number. Each sticker also has a perforated
tag at the bottom that may be removed and
affixed to your form. Tear this tag off and stick it
in the Neuron ID blank on the sheet of paper. If
the perforated tag has already been removed,
write the ID number in the blank.
When all Neuron ID numbers have been collected,
return to the E2 and enter the Neuron ID numbers for each
device. To commission a device, move the cursor to the
device to be commissioned and press (Set Address).
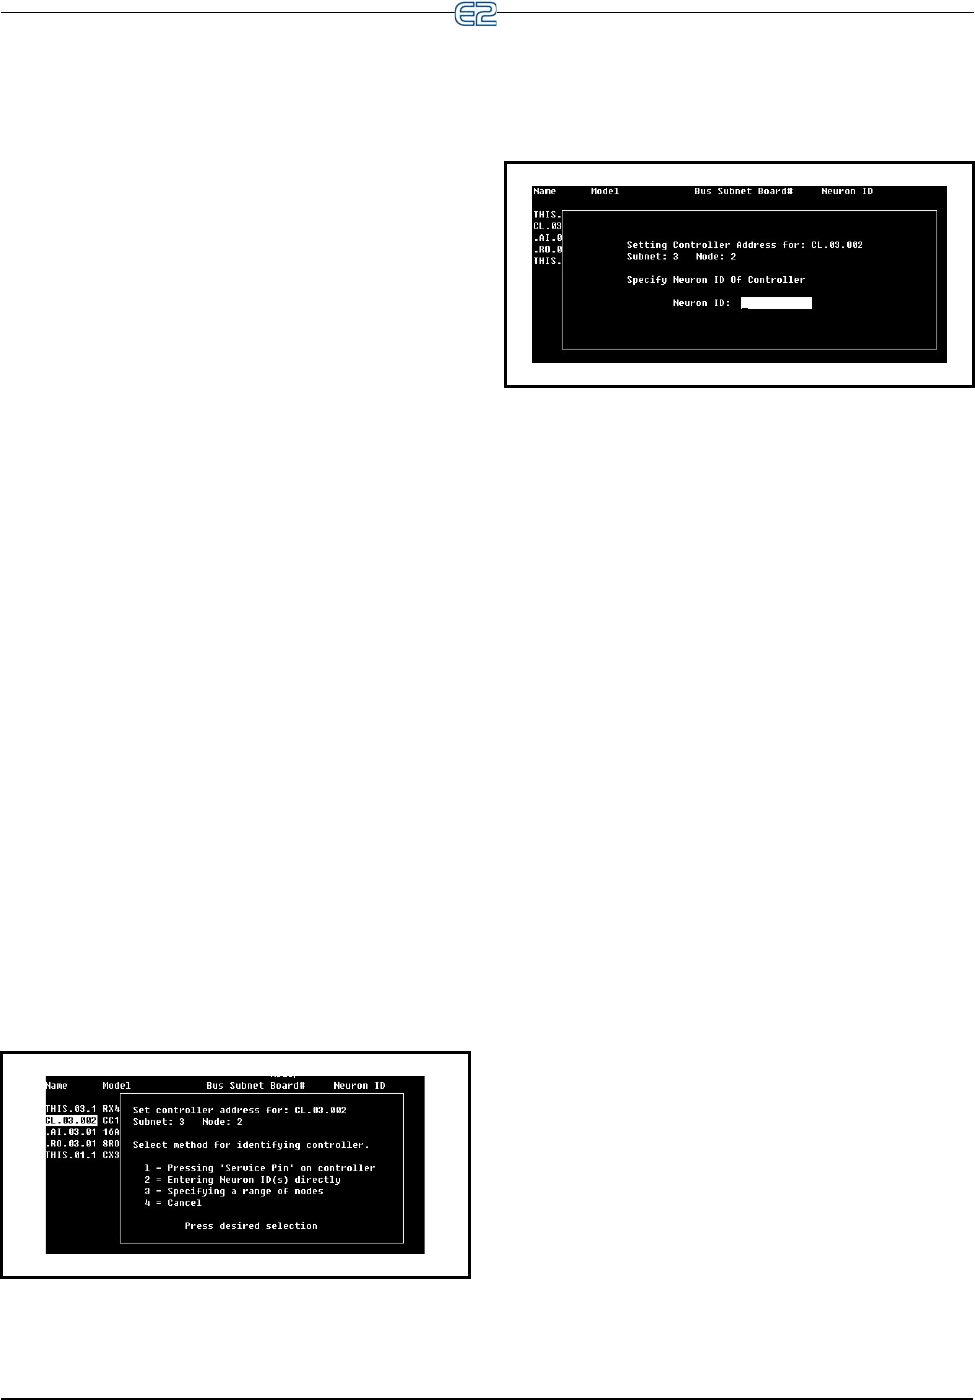
A menu will appear on the screen, giving you the
option of either pressing the service button, entering the
Neuron ID by hand, or cancelling and returning to the
main screen. Press
to select the manual entry option
and bring up the dialog box shown in Figure 10-32.
Enter the device’s Neuron ID as it appears on the form
you created, and press
. The E2 will then look for
the controller with the Neuron ID you entered. If it is
found, the E2 commissions the device, and you may move
on to commissioning the next device.
If E2 does not find it, the display will read “ERROR -
Controller with specified Neuron ID did not respond.”
This could be caused by an improperly entered number, or
it could be caused by a problem with the device’s network
connections or power connections.
When all devices are commissioned, keep the form
with the Neuron ID stickers in an easily accessible place
so that it may be referred to if necessary for board remov-
als, replacements, or troubleshooting.
10.15 License Management
Some applications in the E2 are only available when
activated with a license key that is obtained through Retail
Solutions. Licensing allows the user to activate certain
features in the E2.
To obtain a license for a feature, go to the TCP/IP
setup screen and obtain your E2 controller’s MAC
Address. Press
+ T, or from the Main Menu:
1. Press
(System Configuration)
2. Press
(Remote Communications)
3. Press
(TCP/IP Setup) to open the TCP/IP
Setup screen and locate your E2’s MAC address
(circled in Figure 10-33):
Figure 10-31
- Commissioning Menu
Figure 10-32 - Setting Controller Address - Neuron ID
