9-4 • E2 RX/BX/CX I&O Manual 026-1610 Rev 13 14-SEP-2011
203-5751
Wall-mounted
relative
humidity (RH)
sensor
Down
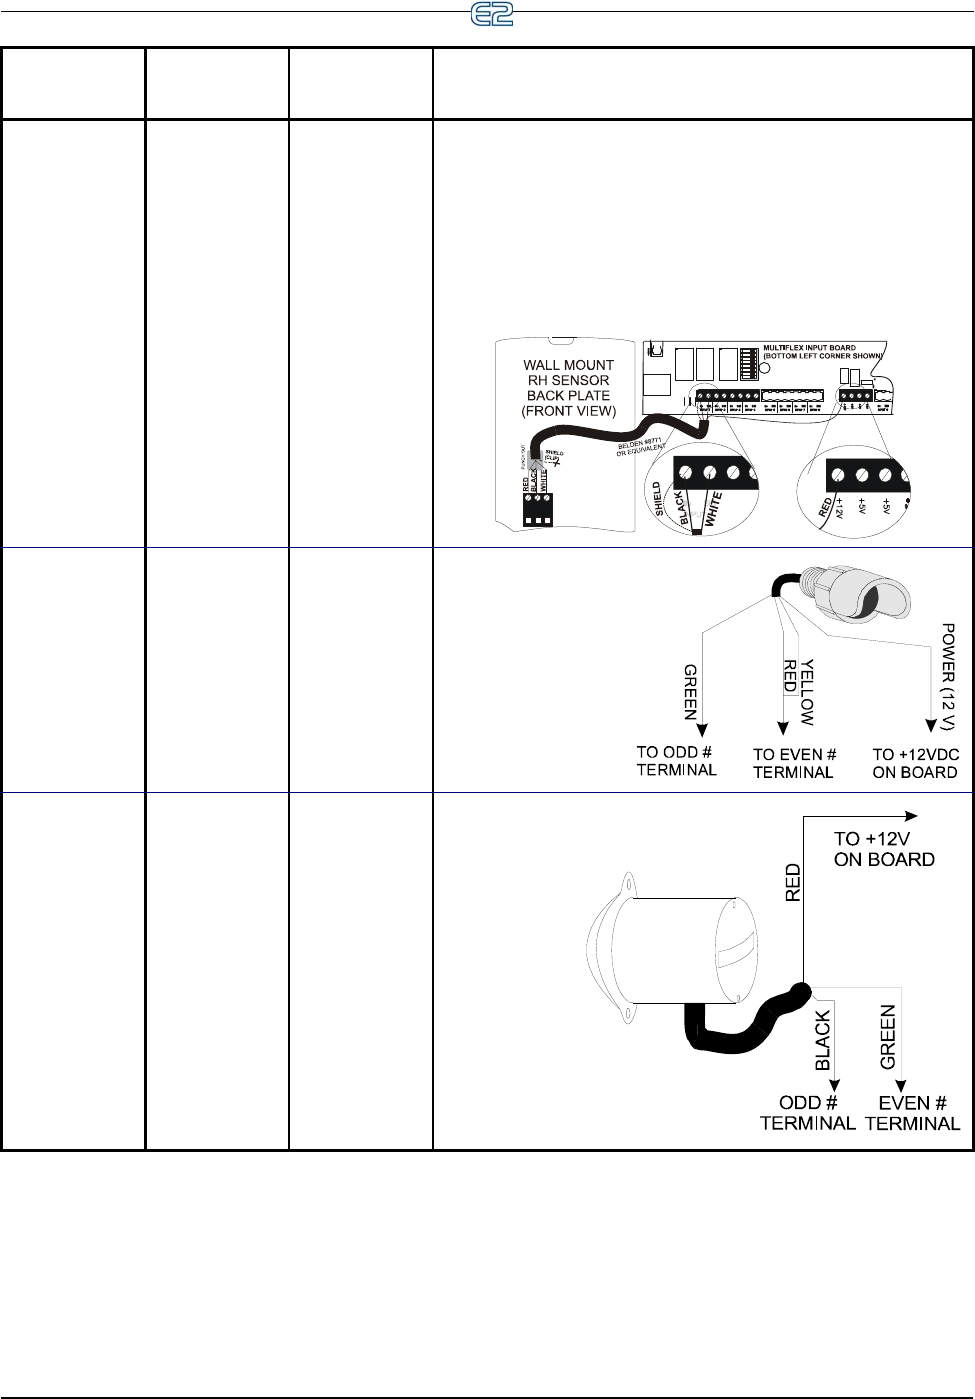
3. Use Belden #8771 shielded three-conductor cable or equivalent.
4. Connect the RED, BLACK, and WHITE wires to the screw terminals the sensor’s
connector as shown in Figure 2. Clip the SHIELD wire.
5. Connect the SHIELD and BLACK wires to the 0V terminal of the input board. Con-
nect the WHITE wire to the SIG terminal of the input board.
6. Connect the RED wire to the +12V power terminal on the input board.
7. Locate the input dip switch for the sensor point, and set to the OFF position (LEFT for
MultiFlex, DOWN for 16AI). Refer to the input board’s user manual for locations of
the input dip switches.
206-0002 Light Level
Down
1. Wire GREEN ground wire
to odd numbered terminal.
2. Wire YELLOW and RED
signal wires to even num-
bered terminal.
3. Wire the POWER wire to a
+12VDC source on input
board.
207-0100 Analog Liquid
Level
Down
1. Connect RED
power wire to
+12VDC source
on input board.
2. Connect BLACK
ground wire to
odd numbered ter-
minal.
3. Connect GREEN
signal wire to
even numbered
terminal.
P/N Sensor
Input Type
Dip Switch
Wiring
Table 9-1
- Sensor Wiring


