Mounting the E2 Mounting • 3-1
3 Mounting
This section gives mounting instructions and dimen-
sions for all controllers and peripherals in the E2 system.
3.1 Mounting the E2
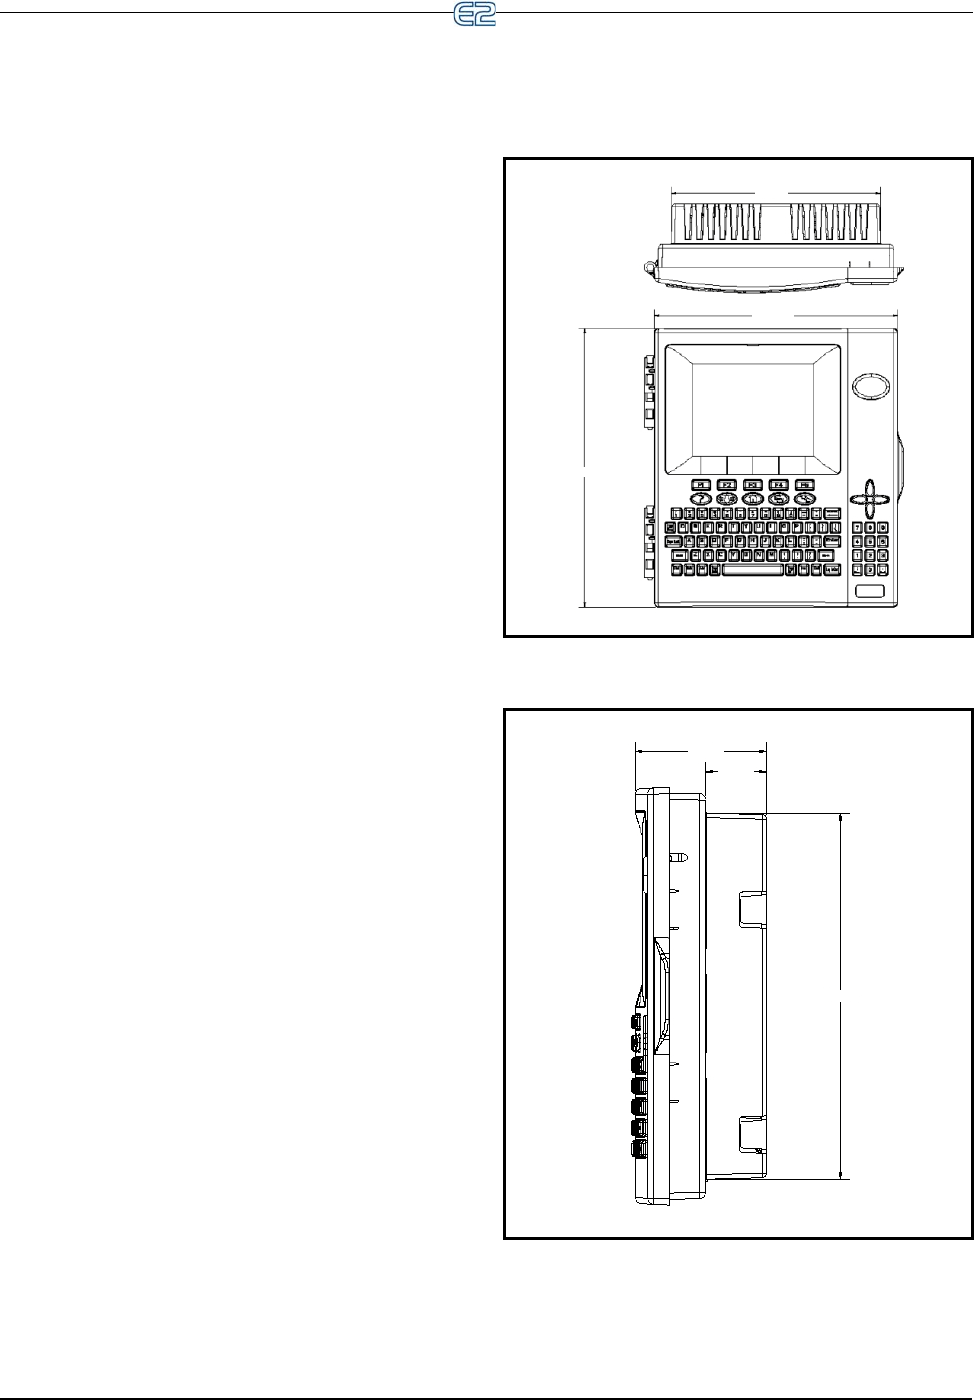
The E2’s box body style is designed to be mounted
against or inside a wall or panel. If mounted against a sur-
face, the controller will be 3.75” off the mounting surface.
If mounted inside a surface, the door and front section of
the back panel will rest 2.0” off the mounting surface. See
Figure 3-1, and Figure 3-2.
3.1.1 Standard Mount
The standard mount is meant for the controller to be
mounted against a wall using the four mounting holes at
the rear of the enclosure shown in Figure 3-3. These holes
are accessible without any removal of boards inside the
enclosure.
3.1.2 Recessed Mount
The recessed mount is meant for the controller to be
bolted against a surface using the eight mounting holes.
The unit may be mounted with the recessed back portion
of the unit inside the wall, and the front portion of the unit
visible through the hole in the wall (Figure 3-1 and Fig-
ure 3-4).
For a recessed mount, you will need to cut a rectangu-
lar hole into the mounting surface 9.0” wide by 10.5” high
(22.86 cm wide by 26.67 cm high). Once this hole is cut,
mount the unit as desired using the eight outer mounting
holes shown in Figure 3-1 and Figure 3-4.
Figure 3-1
- E2 Front and Top Dimensions
Figure 3-2 - E2 Side Dimensions
9.0"
10.5"
12.0"
3.75"
1.75"
10.5"


