


Install INDeX CCM Applications Overview
INDeX Contact Centre Modules Page 52
Installation & Maintenance 38HBK00001SCM - Issue 11 (05/01)
Install INDeX CCM Applications
Overview
This section describes the procedures of installing the software for the INDeX
Contact Centre suite. The installation procedure is divided into the following steps,
which must be performed:
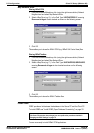
1. Install INDeX CCM applications.
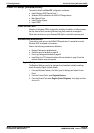
2. Setting SQL Server Configuration Information.
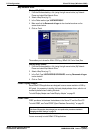
3. Install Windows NT Service Pack 6a.
Note
Once you have completed the installation of the INDeX CCM, ensure you REINSTALL
Windows NT Service Pack 6a, as detailed “Install Windows NT Server Service Pack 6a” on
page 17
Integration of INDeX CCM with INDeX Voice Manager
To integrate INDeX CCM with INDeX Voice Manager, there must only be one
Access Manager running within the system. In this case, the Access Manager must
reside on the Server Cassette.
For the installation of the INDeX Voice Manager, refer to the "INDeX Voice Manager
Installation and Maintenance Manual".
Since the Access Manager resides within the Server Cassette, to integrate INDeX
CCM with INDeX Voice Manager, you need to Disable the INDeX Access Manager
Service residing in the INDeX CCM Server PC.
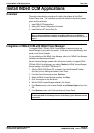
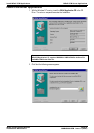
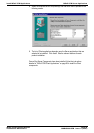
1. After the INDeX CCM Server PC is restarted, from the Windows NT taskbar,
click Start, point to Settings and select Control Panel.
2. From the Control Panel options open, Services.
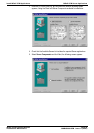
3. Select the INDeX Access Manager and then click Stop.
4. Click Yes to agree to stop the service.
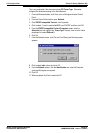
5. With the INDeX Access Manager selected, click Startup.
6. From Service screen, click to select Disable as the Startup Type and then click
OK.
7. From Services screen, click Close and then exit Control Panel.
Note
To enable the INDeX Access Manager Service, set the Startup Type to Automatic and then
restart the PC.