


PC Upgrade Overview
INDeX Contact Centre Modules Page 77
Installation & Maintenance 38HBK00001SCM - Issue 11 (05/01)
PC Upgrade
Overview
The INDeX Contact Centre Manager supports a minimum of 5 (using SPC5)
concurrent supervisor positions. However you can increase the number of clients,
by upgrading to either the SPC10 or SPC20.
This section explains, in detail, the procedures of transferring the relevant data as
well as the SDXArchiver and SDXRepository database from a lower Server PC
specification to a higher Server PC specification (e.g. SPC5 to SPC10/SPC20).
The same procedure is applicable when transferring the data from an earlier version
of the INDeX CCM Server PC to SPC5/10/20.
To upgrade to a higher Server PC specification, as your Server PC within the
network, you need to:
– Change the name of the Source PC as detailed in “Change Server PC Name”
on page 71
– Transfer the Wallboard Server Database from Source PC to Destination PC;
– Copy INDeX Call Centre View folder from Source PC to Destination PC;
– Copy INDeX Taskbar Login Data folder from Source PC to Destination PC;
– Transfer the SDXArchiver Database from Source PC to Destination PC.
Note
During this process you must ensure NONE of the INDeX CCM applications are running.
INDeX Wallboard Server Database Transfer
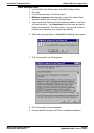
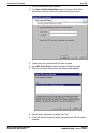
1. From the Source Server PC, map a drive to the Destination Server PC (e.g.
\\newserver\c) as detailed in "Map Network Drive" on page 41.
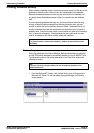
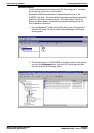
2. From the Source Server PC, using Windows NT Explorer, copy "SDXWB.ini”
“DEVICES.mdb", "WALLBRD.mdb" and "AggregateVars.mdb" to the same
location on the Destination Server PC (i.e. C:\lucent\WBSERVER).
INDeX Call Centre View Database Transfer
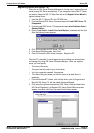
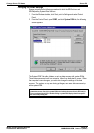
1. From the Source Server PC, map a drive to the Destination Server PC (e.g.
\\newserver\c) as detailed in "Map Network Drive" on page 41.
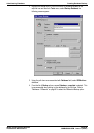
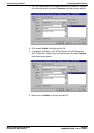
2. From the Source Server PC, using Windows NT Explorer, copy LANGUAGES,
MUGSHOTS and OPERATOR folders to Destination Server PC (i.e.
C:\lucent\CCV).
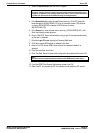
INDeX Taskbar Login Data Transfer
1. From the Source Server PC, map a drive to the Destination Server PC (e.g.
\\newserver\c) as detailed in "Map Network Drive" on page 41.
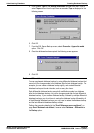
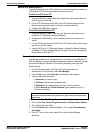
2. From the Source Server PC, using Windows NT Explorer, copy DATA folder to
Destination Server PC (i.e. C:\SDX\Data).