138
APPENDIX F — GLOBAL TIME SCHEDULE CONFIGURATION FOR i-Vu
®
DEVICE
AND CSM CONTROLLER (cont)
Step 2 — Chiller Mode Selection —
There are
3 different mode selections for the chiller which are described
below. In order to change the mode from the default configura-
tion, a scrolling marquee or handheld Navigator™ device must
be used.
1. Using a Navigator device, select Operating Modes
SLCT OPER, then enter the password.
2. The screen defaults to SWITCH Mode. If using an i-Vu
device or CCN Global Scheduling, use the up arrow to
select Time Sched and then press Enter.
or
Click the up arrow and select CCN to control the chiller
using a CCN Network Command of "CHIL_S_S".
MODE DESCRIPTIONS
Switch
— The chiller will be running 24/7 (no time schedule
involved). DO NOT use for the i-Vu device or CCN Global
Scheduling.
Time Sched
— This mode will allow the user to configure a
local schedule and control the chiller by either Local Time
Schedule or by setpoint tables 1 or 2. This mode needs to be se-
lected if i-Vu will be writing to either a Local (S) or Network
(E) Time Schedule.
NOTE: The i-Vu CCN 4.0 device can only write to Network
schedules.
CCN
— This will be used when a CCN controller, like a CSM,
Translator, or CC will be writing to the chiller's CCN point
name CHIL_S_S for starting and stopping the equipment.
Step 3 — Chiller Cooling Set Point Selec-
tion — There are several options for controlling the Leaving
Chilled Water temperature. For the purpose of having i-Vu able
to start stop the chiller through the Time Schedule MODE the
chiller's "Cooling Set Point Select" decision needs to be con-
figured for SETPOINT 1 using a scrolling marquee or Naviga-
tor device.
1. Using a Navigator device, select Operating Modes
SLCT SP.SE, then enter the password.
2. Click the arrow up and select SETPOINT 1 then push
Enter.
Step 4 — Chiller Switch Setup
1. Set the Emergency On/Off Switch (SW2) switch to the
On Position.
2. Set the Enable-Off-Remote (SW1) switch to the Enable
position. (If Remote is used, external contacts will need
to be closed or a jumper needs to be installed on TB-5
no. 9, 10.) The chiller will run off either the Switch,
Time Schedule, or CCN Mode (see Mode Descriptions
in Step 2).
This completes the configuration decisions needed in a
30XW unit to enable i-Vu device scheduling to control the
chiller start/stop.
Step 5 — i-Vu Device Scheduling Setup
CONFIGURING THE i-Vu 4.2 DEVICE (LOCAL AND
GLOBAL SCHEDULING)
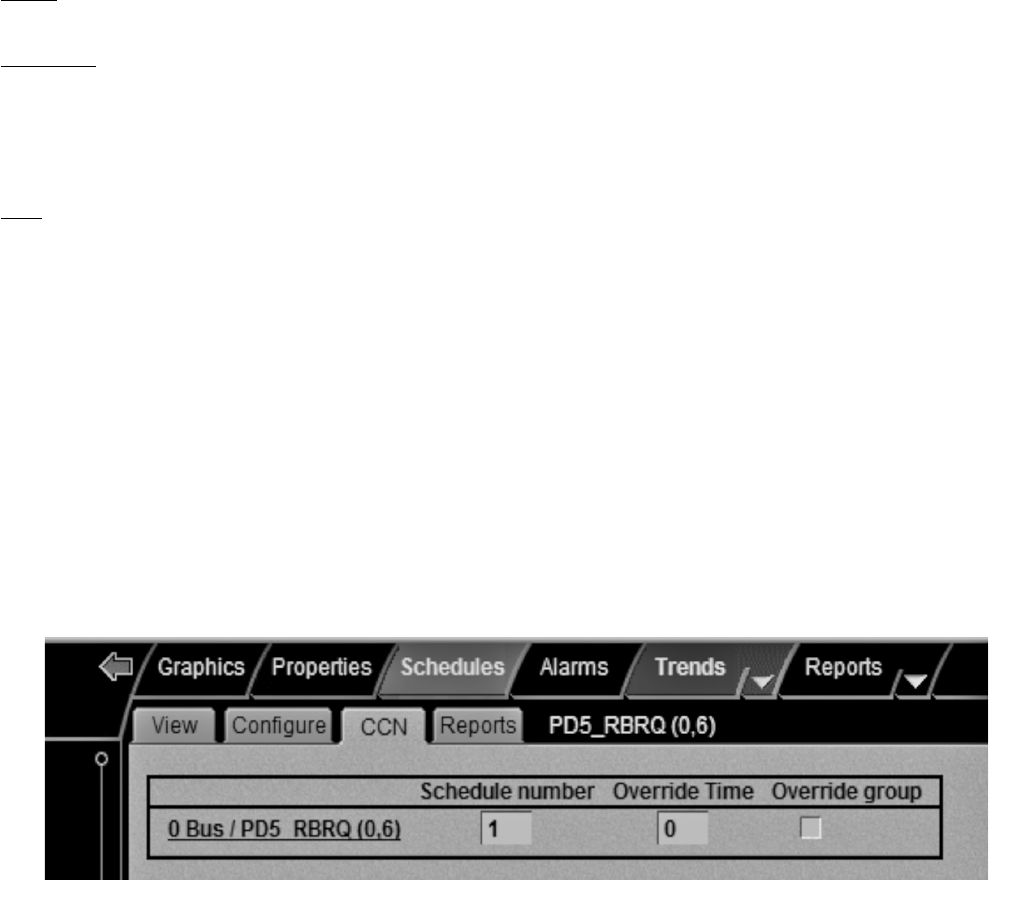
1. After chiller has been scanned into the database, check
the Schedule number. To do this, click on the Schedules
Tab CCN Tab. The CCN Schedule Number needs to
be the same number that the user edited in Fig. A or C for
local or Fig. B or D for global (see Fig. E).
2. Next, create a Schedule by highlighting the chiller.
3. Click on Schedules Configure Add.
4. Then select the type of schedule from the drop down
menu.
Example: Select Normal Weekly and the schedule
should look like Fig. F.
5. Configure the schedule.
NOTE: Refer to the i-Vu Installation and Startup manual for
more information on creating a schedule in i-Vu.
CONFIGURING THE i-Vu 4.0 DEVICE (GLOBAL
SCHEDULING)
1. After chiller has been scanned into the database, check
the Schedule number. To do this, expand the Chiller
on the left-hand navigation pane click the on the
"Schedule" point Properties tab Summary Tab.
Enter CCN Global Schedule Number. It needs to be
the same number that the user edited in Fig. B or D (see
Fig. G).
2. Follow Steps 2 through 5 in the Configuring the i-Vu 4.2
device (Local and Global Scheduling) section.
This completes configuring a 30XW Chiller, i-Vu, and
CCN Network Time Schedules.


