5-9
ISS 506 Integration Seamless Switcher • Switcher Software
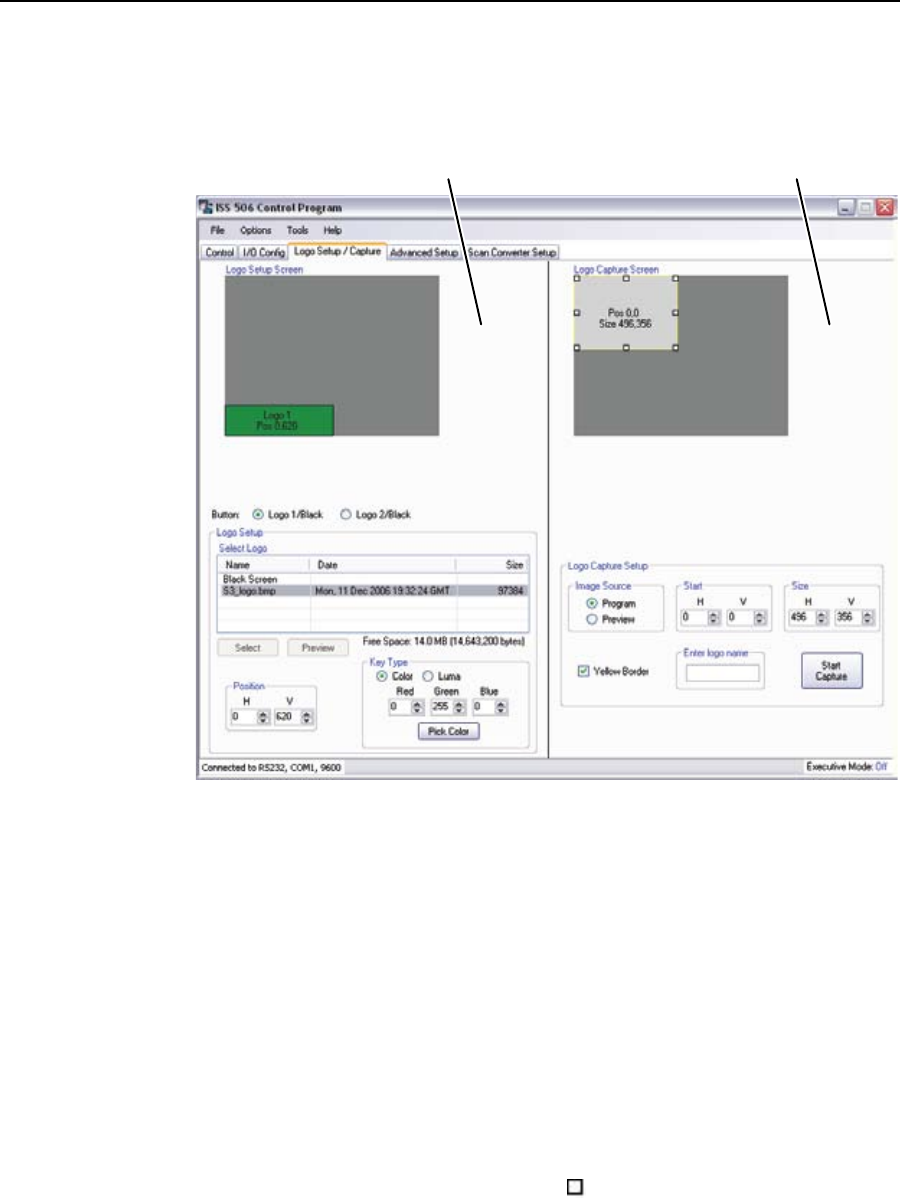
Logo Setup/Capture window
The Logo Setup/Capture window (figure 5-8) consists of two areas: the logo
capture area (on the right) and the logo setup area (on the left). See chapter 3,
“Operation”.
Logo Setup Area Logo Capture Area
Figure 5-8 — Logo Setup/Capture window
Capturing a logo
Capture a logo as follows:
N
For best results, freeze the input with the image that you want to capture.
1. Click the appropriate Image Source Radio button in the Logo Capture area to
select the source (preview output or program output) that has the image that
you want to capture.
2
. If necessary, click (select) the Yellow Border checkbox to display yellow crop
marks on the display with the desired image:
3
. Watch the display with the desired image. On the logo capture area:
a. Click and drag the center of the selection window to center the window
over the image.
b
. Click and drag the anchor points ( ) of the selection window to crop the
image you want to save as a logo.


