3-27
ISS 506 Integration Seamless Switcher • Operation
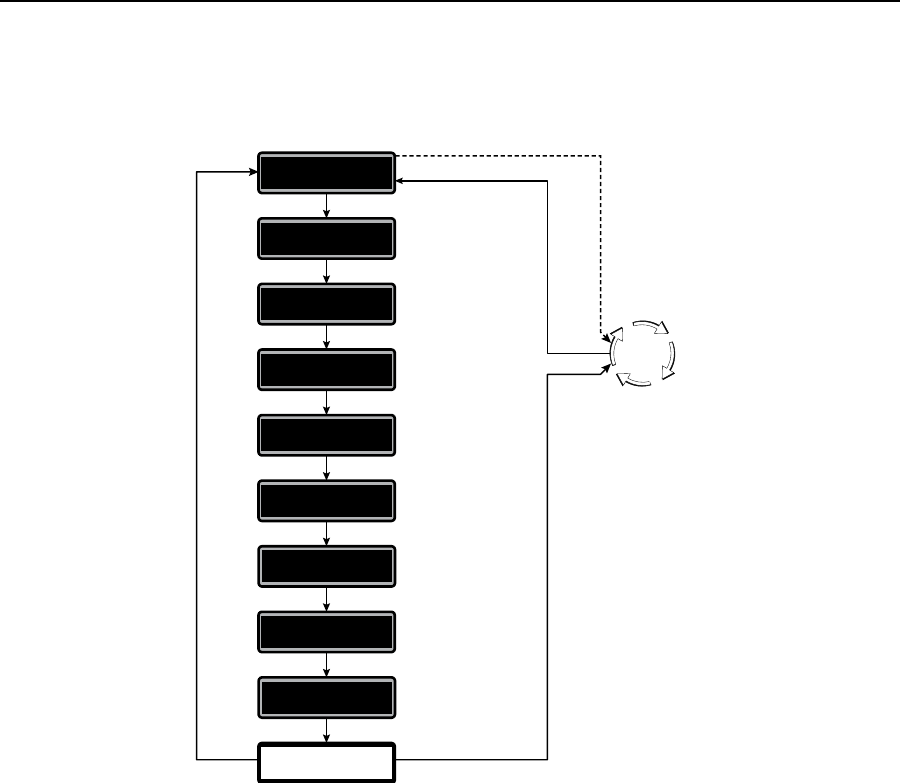
Exit menu
From the Exit menu (figure 3-18), press the Next button to return to the default
display cycle, or press the Menu button to return to the Auto Image menu.
30 sec.
Menu
Menu
Default
Cycle
Next
*
Menu
Menu
Menu
Menu
Menu
Menu
Menu
Menu
Menu
Menu
Exit Menu
Press Next
Input
Configuration
Auto
Image
Output
Configuration
Effects
Configuration
Logo
Capture
User
Presets
View Comm
Settings
Scan Converter
Configuration
Advanced
Configuration
*
* This menu is available
only if the optional
scan converter board
is installed.
Figure 3-18 — Exit menu flowchart
Front Panel Operations
The following paragraphs detail the power-up process and then describe input
selection, switching between the preview and program outputs, preset selection,
capturing and configuring a logo, and using the title function.
Power-on indications
Power is automatically applied when the power cord is connected to an AC source.
When AC power is applied, the switcher performs a self-test that dimly blinks all
of the front panel buttons twice, and then lights only the buttons for the selected
inputs, the selected effect, and the Menu and Next buttons. The self-test also
displays the model name and the firmware version in the LCD window. After
approximately 2 seconds, the LCD window reverts to its default display cycle,
alternating between three displays: two showing the selected program and preview
inputs and their rates, and the third showing the selected output rate (figure 3-19).
An error-free power up self-test sequence leaves all of the buttons off, with the
exception of the selected inputs’ buttons and the selected transition effect’s button,
and the LCD window displaying the default display cycle.


