Operation, cont’d
ISS 506 Integration Seamless Switcher • Operation
3-32
6. Press the Next button (figure 3-25). The Capture Size submenu appears.
Default
Cycle
Press
NEXT
Step
6
Press
NEXT
Step
8
Press
NEXT
Step
10
Step
11
Rotate the knobs to
move the lower-right
corner of the image
area to be captured.
Step
9
Step
7
30 sec.
0000
through
nnnn*
* nnnn = the selected output resolution.
0000
through
nnnn*
Capture Size
X=1024 Y=0768
X-Axis
Y-Axis
From
Figure 3-24
30 sec.
N/A or
1.BMP to
16.BMP
30 sec.
Save Cap to File
9.BMP
N The front panel is
disabled until the
% Done report
reaches 100%.
Saving 9.BMP
yy% Done
MENU
NEXT
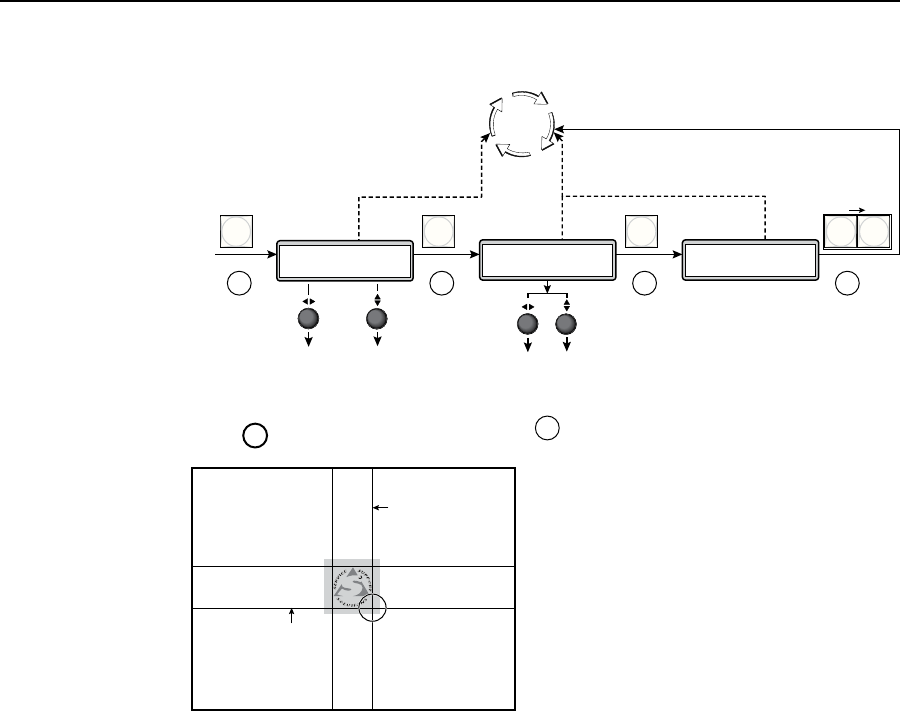
Figure 3-25 — Capturing a logo, continued
7. Use the Adjust knobs to shift the end point (lower-right corner) of the capture
area.
N
Rotate the Adjust
[
knob to shift the end point on the X axis (horizontally).
Rotate the Adjust
{
knob to shift the end point on the Y axis (vertically).
8
. Press the Next button. The Save Capture to File submenu appears.
9
. Rotate either Adjust knob to select one of the available file names (01.bmp
through 16.bmp) or N/A (to abandon the logo).
10
. Press the Next button. The LCD window displays a counter that shows the
progress of the save operation until it reaches 100 percent.
N
Saving a bitmap image can take a couple of minutes. The ISS is unresponsive to
front panel operations and SIS commands while it saves the file.
11
. Press the Next button and Menu buttons as necessary to return to the default
display cycle.


