Operation, cont’d
ISS 506 Integration Seamless Switcher • Operation
3-30
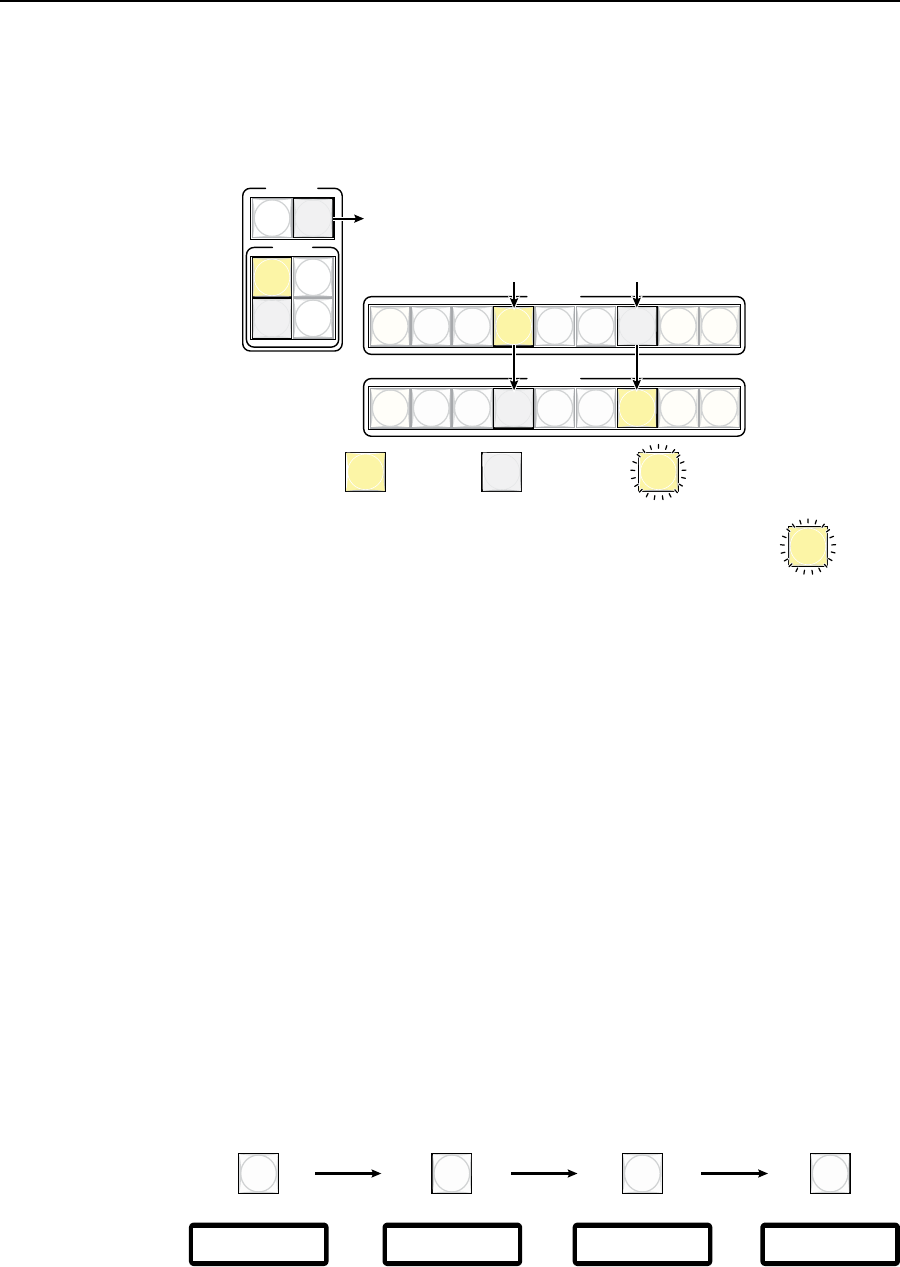
Take button — The ISS switches the input selected as the preview output
to the program output using the effect selected by one of the Effect buttons
(figure 3-22).
TRANSITION
EFFECTS
TAKE
CUT
TAKE
PIP
TITLE
WIPE
DISSOLVE
PREVIEW
1
2
3
4
5
6
LOGO 2
/BLACK
LOGO 1
/BLACK
FREEZE
PROGRAM
1
2
3
4
5
6
LOGO 2
/BLACK
LOGO 1
/BLACK
FREEZE
= Lit button = Unlit button
Press and release the Ta ke button.
If the Wipe or Dissolve effect is selected (lit):
The Preview 3 button goes out and the Program 3 button lights.
The Program 6 button goes out and the Preview 6 button lights.
On the program monitor the switch is accompanied by either the
wipe or dissolve effect (selected using the Effects buttons). The
duration of the effect, from 0 to 5 seconds, is set using the menu
controls. The Ta ke button blinks for the duration of the effect.
If the PIP or Title effect is selected (lit):
The Preview 3 button and the Program 6 button remain lit.
The Ta ke button blinks until you press Cut or Take
to turn off the PIP or title effect.
= Blinking button
Figure 3-22 — Dissolving to the selected input
N
Input selections can be made with the audio broken away under RS-232/RS-422
or Ethernet control only. See chapter 4, “SIS
Programming and Control“;
chapter 5, “Switcher Software“; and chapter 6, “HTML Operation“.
The input button lights green when video only is selected.
The input button lights red when audio only is selected.
N
Video and audio outputs can be muted under RS-232/RS-422 or Ethernet
control only. See chapter 4, “SIS
Programming and Control“; chapter 5,
“Switcher Software“ and chapter 6, “HTML Operation“.
The Input button blinks, alternating between red and amber when video is muted.
The input button blinks, alternating between green and amber when audio is muted.
The input button blinks amber when both video and audio are muted.
Recalling a user preset
There are three user presets per input. The presets save color, tint, contrast,
brightness, detail, sizing, and centering settings. See “User Presets menu”, earlier
in this chapter, to save and erase presets. Cycle through and recall these memories
by repeatedly pressing the appropriate input button. The LCD window identifies
the recalled preset (figure 3-23).
Press Button Press Button Press Button
3 3 3 3
User Preset #2
Recalled
User Preset #3
Recalled
User Preset #1
Recalled
User Preset #2
Recalled
Figure 3-23 — Recalling user presets


