Modifications, cont’d
ISS 506 Integration Seamless Switcher • Modications
7-10
Closing the Switcher
1. Reconnect the fan power cord to connector J46 on the main board.
2. Replace the top cover on the ISS.
3. Fasten it with the screws that were removed in “Opening the Switcher“,
step 3.
4
. Rack mount the switcher if desired and reconnect all cables.
Button Labels
Page 7-11 provides strips of blank button labels. If desired, photocopy them or cut
them out of the manual, write button information in each button area as desired,
and put them in the switcher’s input or output buttons’ windows.
N
You can also create labels using the Button-Label Generator software (see
chapter 5, “Switcher Software”).
Installing labels in the switcher’s buttons
Use the following procedure to install new labels in the seamless switcher’s front
panel buttons.
1.
Make new labels using the blanks on page 7-11. Cut them out.
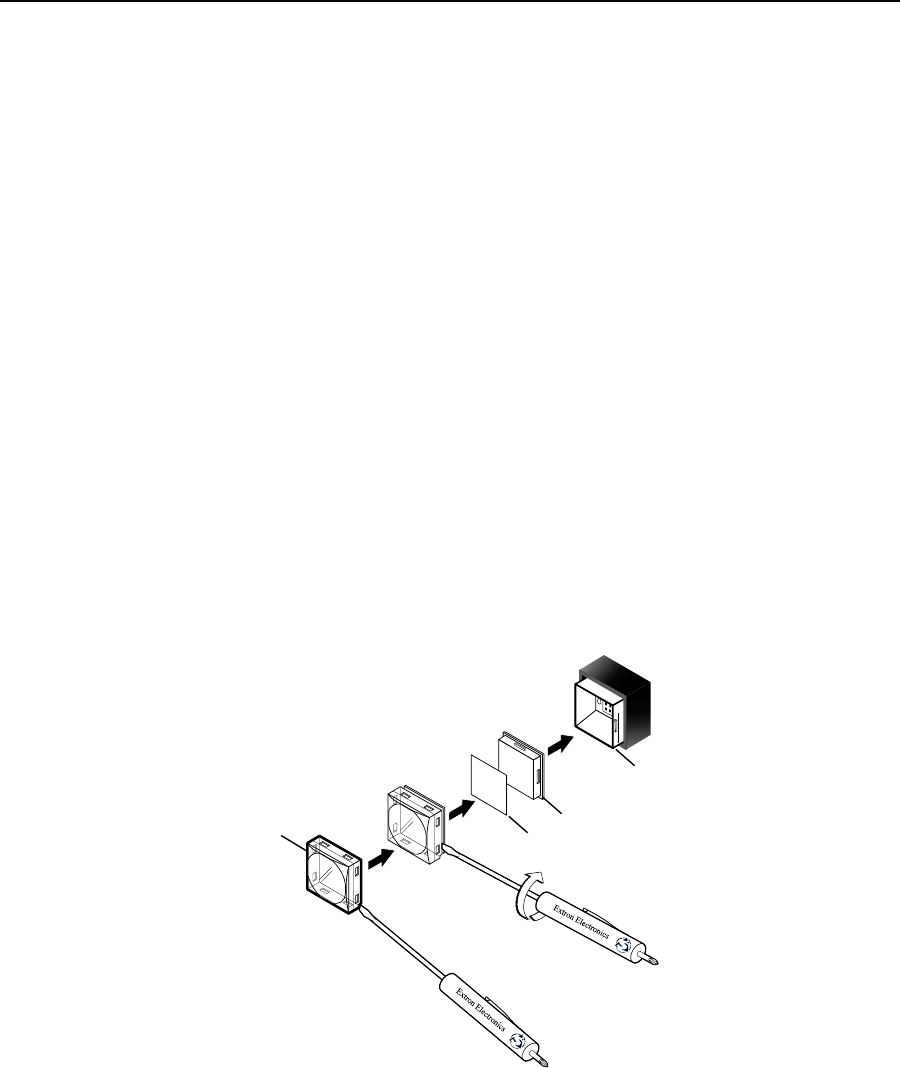
2. Remove the button from the switcher by grasping the button firmly and
pulling it away from the front panel (figure 7-12).
N
There are different button models available. Your buttons may appear different.
TEXT
Separating the two-
piece button here at
the corner.
Pry the two
pieces apart.
Diffuser
Base
Button Label
Clear Lens
Figure 7-12
3. Use a small screwdriver or Extron Tweeker to gently lever the button cap off
of the white backing plate.
4.
Insert a button label into the cap and gently but firmly press the cap onto the
white backing plate.
5.
Press the button into place in the seamless switcher.


