


Install and configure ITG ISL Trunk node Page 229 of
378
ITG Trunk 2.0 ISDN Signaling Link (ISL) Description, Installation and Operation
6 Reboot each ITG card that received transmitted software, so that the
new software can begin operation. Start the rebooting with Leader 0,
then Leader 1, and finally the follower cards.
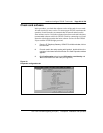
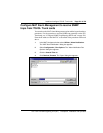
Double-click on card in the lower part of the IP Telephony Gateway -
ISDN IP Trunk Main window. The Card Properties Maintenance tab
appears. Click Reset to reboot the card. Click OK.
Note:
You also can reset the cards by pressing the “Reset” button on
the card faceplate using a pointed object.
7 From the IP Telephony Gateway - ISDN IP Trunk Main window, select
the new node. Select menu View/Refresh/Selected or press F5.
8 After all ITG cards have been reset and have successfully rebooted,
the Card state column shows disabled: active for Leader 0; disabled:
standby for Leader 1; disabled for Followers.
9 Double-click each upgraded card. Click the Configuration tab of the
Card Properties window and check the S/W version.
10 Use the overlay 32 ENLC command to re-enable the ITG cards.
The software upgrade procedure is complete.
Upgrade the DCHIP PC Card
1 Copy the DCHIP PC Card driver to the /C: drive of the Leader card
using FTP.
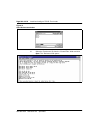
2 In the IP Telephony Gateway - ISDN IP Trunk Main window, right-click
on the DCHIP card and select Telnet to ITG Card from the right-click
menu.
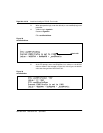
The Telnet window appears with the VxWorks prompt:
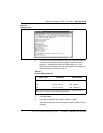
3 When prompted to login, enter the default username and password as:
VxWorks login:
itgadmin
Password:
itgadmin
ITG>
4 Disable the ITG Trunk 2.0 card in LD32 (DISI lsc). Wait for the NPRxx
message.
5 Use the command DCHdisable to disable the D-channel function on
the card.