


Chapter 13 Keyframe Effects
148
Creating and Saving a Master Timeline
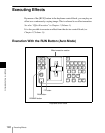
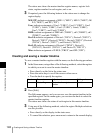
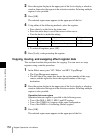
The status area shows the master timeline register names, register lock
status, register number for each region, and so on.
3
If required, press the following buttons in the status area to change the
region display.
M/E, P/P: indicate assignment of M/E-1 (“M/E1”), M/E-2 (“M/E2”), M/
E-3 (“M/E3”), and P/P (“P/P”).
User: indicate assignment of User1 (“USR1”), User2 (“USR2”), User3
(“USR3”), User4 (“USR4”), User5 (“USR5”), User6 (“USR6”),
User7 (“USR7”), and User8 (“USR8”).
DME: indicate assignment of DME ch1 (“DME1”), ch2 (“DME2”), ch3
(“DME3”), and ch4 (“DME4”).
Dev1-8: indicate assignment of Device1 (“DEV1”), Device2 (“DEV2”),
Device3 (“DEV3”), Device4 (“DEV4”), Device5 (“DEV5”), Device6
(“DEV6”), Device7 (“DEV7”), and Device8 (“DEV8”).
Dev9-12: indicate assignment of Device9 (“DEV9”), Device10
(“DEV10”), Device11 (“DEV11”), and Device12 (“DEV12”).
Misc: indicate assignment of P-BUS (“PBUS”) and GPI (“GPI”).
Creating and saving a master timeline
To save a master timeline register with the menu, use the following procedure.
1
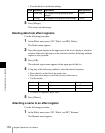
In the Store menu, using either of the following methods, select the register
in which you want to save the master timeline.
• Press directly on the list in the status area.
• Press the arrow keys to scroll the reverse video cursor.
• Turn the knob to specify the register.
2
Press [Edit].
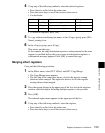
The Edit menu appears, and you can now save the master timeline in the
specified register. In this menu again, you can turn the knob to select the
master timeline register.
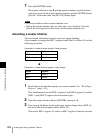
The status area shows the status of each region in this master timeline.
3
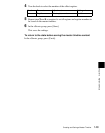
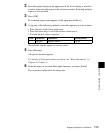
Using any of the following methods, select the region. Multiple selections
are also possible.
• Press directly on the display in the status area.
• To cancel the selection, press once more to return to the normal display.
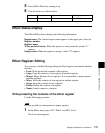
Knob Parameter Adjustment Setting values
1 Master Reg Master timeline register
number
1 to 99