


DES-7200 Configuration Guide Chapter 7 PIM-SMv6
Configuration
7-16
7.3.2 Delete Internal PIM-SMv6 Messages
The following commands delete internal PIM-SMv6 messages.
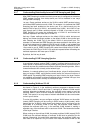
Command Function
DES-7200# clear ipv6 mroute Clear multicast routing entries.
DES-7200# clear ipv6 mroute
statistics
Clear multicast routing entry
statistics.
DES-7200# clear ipv6 pim
sparse-mode bsr rp-set
Clear RP-SET.
DES-7200# clear ipv6 pim
sparse-mode track
Reset the beginning time of statistics
and reset PIMv6 packet counter.
For details, refer to PIM-SMv6 Command Reference.
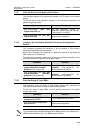
7.4 PIM-SMv6 Configuration Example
Configuration Requirements
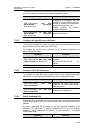
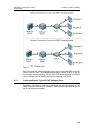
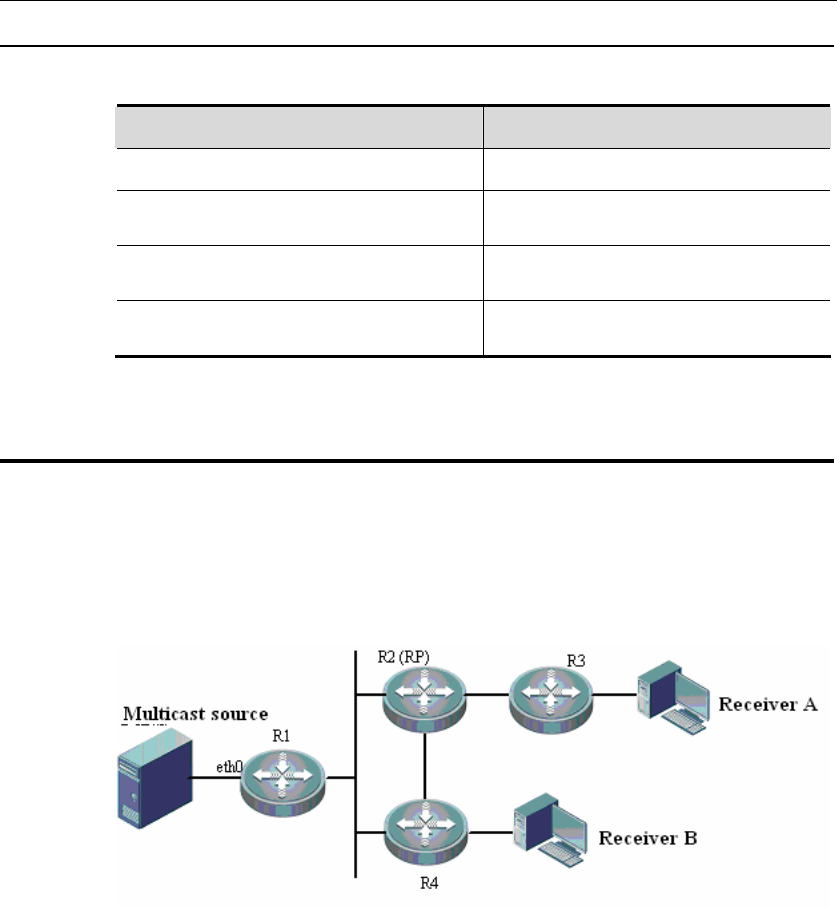
Figure 2 illustrates network topology. R1 and the multicast source are located in
one network. R2 is set to be RP. R3 and receiver A are located in the same
network. R4 and receiver B are in the same network. Assume that devices are
connected properly, IPv6 is enabled on each interface and IPv6 unicast is
enabled on every device.
Figure 6 PIM-SMv6 topology
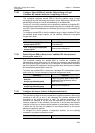
Configuration steps
Step1: Enable multicast routing
Enable IPv6 multicast routing on R1. The configuration is similar on R2, R3 and
R4.
DES-7200# configure terminal
DES-7200(config)# ipv6 multicast-routing
Step 2: Enable PIM-SMv6 on the interface
Enable PIM-SMv6 on R1’s eth0. This configuration is similar on the interfaces of
R1, R2, R3 and R4.
DES-7200(config)# interface eth 0
DES-7200(config-if)# ipv6 pim sparse-mode
DES-7200(config-if)# end
Step 3: Configure candidate BSR and candidate RP.
Set R2’s loopback1 to be C-BSR and C-RP
DES-7200(config)# interface loopback 1
DES-7200(config-if)# ipv6 address 2008:1::1/64
DES-7200(config-if)# ipv6 pim sparse-mode